Fender necks
were often finished with a very thin lacquer coat. Over time the lacquer
would wear and expose raw wood. To protect the neck from oils and
to return the original feel of lacquer here is a solution. For those who
are finishing a new neck this finishing recipe will work for you also.
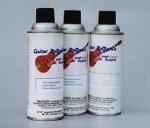
One can of Neck Amber and one can of Clear will be more than enough for
a neck.
Fender Neck Refinishing
Although the
early Fender necks may appear to be natural in color and yellowed by the
aging of the nitrocellulose lacquer coat (the very early necks show a slight
red tint) they are in fact tinted with a lacquer based dye sprayed as a
shader coat. The two part application of Fender Neck Amber and clear coating
will replicate the finish.
(Note that the
Neck Amber aerosol is a dye mixture in solution. There is no lacquer in
the aerosol. The reason for this is that components of a dye mixture will
fall out of a lacquer solution over time and change the color of the dye.
A two part application (dye followed by clear) allows the color to remain
true)
First remove
and strip the neck. (Be careful not to remove any stampings or pencil marks
that may authenticate the neck). If possible leave the peghead face intact.
Finding replacement decals may be difficult. Also, if possible, leave the
peghead sides intact. Doing so will give a measure of protection between
the area to be stripped and the peghead face. Tape the sides and protect
the face with heavy paper or cardboard. DO NOT TAPE OVER THE DECALS. If
you do they will likely come off with the tape. Place the protective paper
(cut to the shape of the peghead) over the peghead and tape it to the side
tape. You can now begin stripping the unprotected areas. Use a paste stripper
such as "Strip Ease" or for poly coated necks "AirCraft Remover". More
on stripping can be found in the "ReRanch 101 " section.
After stripping
you may encounter stains which defy all stripping, sanding and bleach.
The stains are from the body oils of all those who over the years have
played the instrument. They will most likely be found at the thumbstop
and heel. After clear coating these stains may show as a light red tint.
You may reduce these stains with either chlorine or oxalic acid crystal
bleach (wood bleach) but you may find that deeply embedded stains may never
be completely removed. Personally, I prefer leaving the stains alone. They
add to the its character and are part of the history of the guitar.
Once stripped,
lightly sand the neck. Normally only #220 and #320 grades will be needed.
If the finger board is not maple tape the board to protect it. I have found
it best to tape just the face of the fretboard. Tape over the bevel line
of the frets but not beyond leaving the sides along with the position markers
clear to be sprayed.
If the fretboard
is maple you can color and clear it in conjunction with the rest of the
neck. You can tape the frets before coloring but I have found that it is
much easier to spray the frets with the color and clear coats and clean
any build up off the frets after the lacquer is dry. Lacquer does not like
unprimed metal and as it dries seems to shrink away and off the frets.
Any remaining lacquer can be scrapped off (usually with your fingernail).
Fender developed a "special tool" for removing the lacquer. They used a
nail with the fret profile notched into the side of the nail head to scrape
the frets. The last prep steps are to wipe with the neck a tack cloth and
position it for spraying.
With the neck
in position (most people prefer hanging the neck) the neck is now ready
to be sealed. Spray two coats of clear lacquer from The Guitar ReRanch
clear aerosol spray can (two nozzles are included with the clear; a round
pattern red and an adjustable fan cream nozzle. For necks the red nozzle
with its narrower spray width seems the better suited). Let the first coat
dry about thirty minutes before spraying the second. Let the sealer coats
dry at least a few hours or better yet, overnight. The sealer coats will
prevent the color coat from going into the wood. By first sealing the wood
the color coats may be wiped off with thinner if the application is too
dark or uneven. Without adequate drying of the sealer coats the shader
color will be wiped into the wood and possibly require a restrip, resand
and reprep.
Before coloring
the neck make a few practice passes on a piece of scrap wood similar to
the neck wood. The depth of the color is controlled by the number of spray
passes made and the spraying distance (usually about 18 to 24 inches).
Once you have a feel for the proper spraying distance and coloring as it
relates to the number of passes you can spray the color.
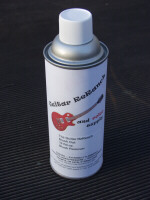
Two nozzles
are provided with the Neck Amber Aerosol. The cream color nozzle is a fan
and has a tip that can be rotated for either a horizontal or vertical spray
pattern. The red tip is narrower round pattern. I prefer the red tip for
spraying necks. Use the fan tip for spraying a body. Spray the first few
coats from a distance of about 18 to 24 inches. These coats and all following
coats should be sprayed lightly. Spraying too lightly may not be possible.
Spraying too heavily may cause streaking and (although hard to do) runs.
When the color
depth appears correct shoot a coat of clear to reveal the true color (aniline
dyes may not reveal their true character until clear coated). If the color
is too light shoot one or two more coats of color until it appears correct.
(Sandwiching the color between clear coats will cause no problems in that
the subsequent clear coats will melt the lower coats of clear and color
together). Typically, from three to eight passes will be needed for a medium
amber sixties look. More for a fifties look.
With the color
acceptable the clear coating can be completed. Three to six coats of clear
nitrocellulose lacquer can be applied following the guidelines in ReRanch
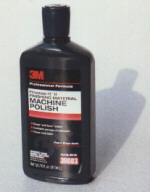
101. Let the neck dry (five days is optimum) and polish again as noted
in ReRanch.
Clear Coating Decals
Early headstock
decals were not clear coated by Fender (you'll understand why in a minute)
and as such are prone to damage and loss. If your decal has been destroyed
replacement decals are available through authorized Fender dealers. (The
dealer may ask you to bring the neck in to verify the neck is an actual
Fender product).
First clean
the peghead with naphtha to remove any contamination and apply the decal.
Most decals are of the water soluble type and after soaking will easily
transfer from the carrier paper to the head stock. When in place smooth
the decal with a damp finger to flatten and remove excess water from under
the film. When dry the clear coating can begin.
The film of
the decal is a thin plastic sheet that will crinkle and lift if too heavy
of an application of lacquer is made without first protecting the decal.
Light misting coats of lacquer will offer this protection as well as soften
the old finish and prevent lifting it. Here is an application schedule
that will give a good clear coat without damaging the decal (and give you
an idea why they weren't originally coated by Fender).
After applying
the decal and letting it dry completely, spray a misting coat of clear lacquer over
the decal. Let this coat dry about an hour. Then spray another misting
coat and let this coat dry an hour. Spray on one more mist coat and let
the lacquer dry overnight. These three misting coats will do two things;
they will soften the decal and surrounding older finish to prevent shocking
and allow the new coats to better bond. They also will act as a barrier
coat for the next somewhat wetter coats. After drying overnight spray with
a medium coat of lacquer. If nothing moves you should be ok. After an hour
spray one more medium wet coat and let dry again over night. The next day
spray two to three wet coats with each coat separated by
an hour's drying time. When dry (about three days) wet sand with a block
in steps of #600 to #1500 and polish.
Again, the underlying
reasoning for the step approach is the tendency of the unprotected decal
carrier to crinkle if too heavy of a coat of lacquer is applied. The light
coats will give the protection needed to prevent crinkling.
Many of the
finishes discussed can be achieved with the products offered by The Guitar
ReRanch.